

‘The Advantages of Both No-Till & Conventional Tillage.’
By Emily Croft
With concerns for soil health, many producers look for alternatives to conventional tillage. Strip tillage offers Ontario crop growers an interesting option that sits in-between conventional and no-till systems.
Strip-till generally involves tillage at 30-inch spacings, removing the residue and preparing the soil only in the planting zone. This allows the soil to warm and dry in these strips but will leave approximately two-thirds of the field undisturbed. Strip-till is largely used for corn, but many producers have experimented with 30-inch-row beans as well.
Ian McDonald, crop innovation specialist at OMAFRA, has worked with several producers who have implemented strip-till on their farms.
“What I like about strip-till is that it plays to the advantages of both no-till and conventional tillage, and it overcomes some of the negatives of both,” says McDonald.
As a newer practice with many approaches, it may be intimidating for producers to consider transitioning from their traditional tillage setup to a new strip-till unit.
How could strip-till benefit your operation and what factors need to be considered when trying it?
What does it offer?
The initial draw to strip-till for many producers are the soil benefits.
With only one-third of the field worked, soil erosion is decreased. McDonald notes that some producers report seeing erosion over-winter with fall strips, but that this erosion is concentrated in the tillage zone as opposed to sheet erosion across the whole field.
“When you cultivate, especially with fall tillage, it tends to be aggressive,” says McDonald.
“Worms and microbes go for a bit of a ride. For strip-till, there’s 66 per cent of the field that the tillage implement doesn’t get to.
“It’s much less disruptive of the soil microbiome. Whereas with conventional tillage, there isn’t an escape route for the organisms except for down.”
A secondary benefit of strip-till is reduced costs associated with field work.
“For some producers, it’s taken five operations and turned them into three. They combine, then follow the combine with strip-till in fall in wheat and soybeans, and then next year they plant and spray rather than two to five more cultivations after a fall cultivation,” says McDonald, pointing out that less time in the tractor seat can free up producers to go over more acres.
Matt Beischlag, a producer from Hagersville, has been using strip-till on his farm since 2017. He says this is one of the major benefits they see in the tillage method.
“The biggest benefit for us is manpower on farm,” says Beischlag.
“We do all our strips in the fall and then in the spring it’s just spraying and planting. It’s eliminated two other people or pieces of equipment for sure.”
These benefits can be achieved through a few different approaches. Each farm will need to determine their own approach to strip-till based on what they hope to achieve from the practice.
Deciding on an approach
The major factors to consider when implementing strip-tillage are timing, equipment, and fertilizer.
“Everybody has their preferred system,” says McDonald.
McDonald shares a few reasons why a producer may choose to strip-till in the spring or fall.
“I like spring strip-till because the ground is unworked in the fall. The over-wintering period is the most sensitive part of the year in terms of soil damage and erosion.
“Some guys on heavier soil get nervous about waiting until spring. Fall tillage is more likely to result in early soil warming and drying in the spring to facilitate early planting.
“There are some guys that will do fall strips because they want their fertilizer (P and K) to mineralize over-winter with the freeze and thaw, more is available to the plant the next spring. Sometimes spring-applied fertilizer is less available,” he says.
Ben Rosser, a corn specialist with OMAFRA, adds some insight into choosing the right timing for strip-till.
“The biggest driver is going to be soil texture,” says Rosser.
“On heavier soil – clay loam or heavier – you’ll likely want to do fall strips. You don’t want to be on that kind of ground in spring or worry about how good of a strip you’re getting when the ground is wet.
“With lighter soil, strips could be done in the fall or spring.”
Choosing the right equipment is another important factor in the success of a strip-till program.
“There is a wide array of equipment. There’s a big difference in costs, how they perform in different residue types, and their fertilizer placements,” says Rosser.
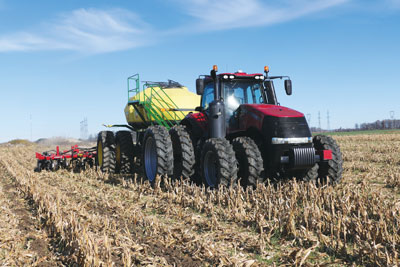
Beischlag shares that they use the air cart from their air drill to pull their strip-till unit.
“We have a John Deere 1910 air-cart with three tanks, and we pull our strip-till unit behind it,” says Beischlag.
“We went that route just because we wanted something to plant wheat with.
“The air-cart is dual purpose – we just put our Case IH toolbar back on to put in wheat in the fall.”
He opted to go the route of fall strips, partially due to the heavy clay soil they farm.
“We do September strips. It’s easier to get fertilizer because companies aren’t as busy, we aren’t doing a whole lot in August and September, and it’s when it’s good and dry,” Beischlag explains.
“With shanks, we want to go in when it’s dry and not rush to put strips in ahead of the planter.”
He adds that they initially ran a strip-till unit with coulters before switching to a machine with shanks for the heavy clay.
“With a coulter machine in heavy clay, if the ground got too hard, we had a hard time getting it into the ground.
“We went with the shank machine so that the shanks pulled it into ground, instead of relying on the weight of the implement.
“The shank machine was also more cost-effective than another coulter machine we looked at.”
The final major consideration for strip tillage is how it works into a farm’s fertility plan. This decision is related to both timing and equipment selections.
Rosser explains that timing influences what fertilizer can be put down into the strips.
“In the spring, nitrogen can go down in strips, which you couldn’t do in the fall. Fall programs with P and K are fairly safe, whereas in the spring there’s some concern of how much you can put down with crop safety.”
While Rosser says there currently isn’t much for formal guidance on fertilizer rates with strip-till, he suggests talking to others who are strip-tilling and figure out what works for them, or working with an agronomist with experience with strip-till.
“If you are putting fertilizer deep to the bottom of the shank you can get away with applying more than in shallow strips, and it depends a bit on how much you are mixing in the strip.”
Rosser also shares that OMAFRA is currently working on some research looking at strip depths and fertilizer rates for spring strip tillage, with the goal of creating more data for producers to use in the decision-making process.
Adapting to challenges
As with every new farm practice, adopting strip-till into a field preparation program can come with challenges.
McDonald says one of the biggest challenges is mindset and encourages producers to be open to new practices.
“One of the biggest challenges is the space between your ears. It’s a lot of ‘dad and grandpa always did it this way and I don’t need to change.’ I disagree. I am hugely pro strip-till, and I think people would find advantages in it.”
For those who are hesitant to invest in a strip-till unit, or who are reluctant to switch entirely, McDonald suggests working with a neighbour who already does it on their own farm.
“There’s a hesitancy to move to new technology. The best way to start is to find someone in the neighbourhood who strip-tills and get them to do the strips and plant it and compare it to conventional fields.
“See how it works and then progress into that decision.”
McDonald cautions that it is important for the neighbour who does the strips to plant it as well.
“If you plant it yourself you might not have your planter set up properly for it.”
Beischlag says that planter setup was one of the challenges they experienced when transitioning to strip-till.
“When we started, we did it with an eight-row strip-till unit and 12-row planter. Even with RTK guidance that wasn’t good enough,” says Beischlag.
“It’s a must to have a strip-tiller that matches the planter size. We saw around a 40 per cent yield reduction if you aren’t right on that strip planting corn.”
Rosser says if it’s not feasible to have the same person put in strips and plant, the person strip-tilling should at least have experience in the planter.
“If there’s another person strip-tilling and you’re planting, you might want to talk about how the field should be laid out.
“The person strip-tilling needs to have the mindset of a planter as opposed to throwing anyone on a cultivator in a conventional system.”
Rosser shares some additional challenges that may arise.
“What are the economics to convert? If you have brand new line of tillage equipment, it may be different than if your equipment is worn out and you’re going to replace it anyways,” says Rosser.
“How are you outfitted with GPS? Do you need RTK guidance and what’s your topography? If you’re coming from conventional tillage, your nitrogen program might also need to change.”
Beischlag encourages producers who are experimenting with strip-till to keep trying.
“The biggest benefit is the cost we are saving on tillage and manpower in the spring. And now that we don’t have fertilizer on the planter, we aren’t carrying dry fertilizer and filling up every 30 or 40 acres. We are now getting 60 to 70 acres out of a fill.
“It just gets better, and you learn so much that first year. Don’t give up on it.” BF
Post new comment